Wednesday, February 8, 2017

Nature Journaling


Now that Luke and Abbey are both old enough to read and write well, we decided it was time to really begin nature journaling.  Of course, being able to read and write well is not a requirement for nature journaling, but it certainly helps us be able to take it to the level I have always envisioned.   Anyone, at any age, can nature journal.  And nature journaling can really be whatever you want to make of it.  There are absolutely no rules.  It can be simply drawing pictures of what you see, it can be words (in the form of an essay, a poem or randomness), or it even can be actual items you have collected and pasted or glued into the book.   We have sort of done a little of each of these.  But, my favorite way to "nature journal" is how we did it today.  It is really more of nature study and "nature notebooking".

Today was another absolutely gorgeous February Day.  If I plopped you right in the middle of today without telling you what day it was, you may have thought it was late spring.  The high is 83 degrees, it is sunny, with just a few cirrus clouds in the sky, along with a gentle breeze.  Spring flowers are popping up all over the place in our yard.  So, as soon as we did some chores inside, read some books and prepared our Valentine's Cards for Lego Club this week, we headed outside to our front yard with our picnic blanket, nature journals and cameras.  First, we looked around and noticed the numerous dandelions popping up.  Now, to some, dandelions are a weed.  But to me, they are far from that.  If you have ever gone to the farmer's market or whole foods and have seen dandelion leaves or dandelion root there for sale, you may know that dandelions are actually cherished by many.  Therefore, we figured that it would be fun to learn all about dandelions.  We got on my phone, and used good ole' Google to learn all we could about the flower.  We learned about all of the stages of the flower, and we learned some really interesting facts about them. Did you know the wind can carry those seeds for up to 5 miles?  We learned all about how to prepare the different parts of the dandelion if you plan on eating it.  We learned about all the health benefits of dandelions.  We learned that dandelions have one of the longest growing seasons on earth.  They provide constant food for bees, which is one of 93 insects that use its pollen as food.  Dandelions aren't just pretty, they are important.  As Ella Wheeler Wilcox said, "A weed is but an unwanted flower."   Many would say our yard is full of weeds.  But, I would say it is full of flowers.  Abbey and Luke would completely agree!

Abbey loves to frolic in our "weeds".


Once we learned all about dandelions, we decided to capture photos and take samples of each of the various stages of the dandelion.  We have all of the stages in our yard.  


First, the germination stage occurs when a seed finds its way to perfect growing conditions:  moist soil, sunlight and temperatures of at least 77 degrees.  The seedling stage is when the plant develops leaves and roots: it occurs during this germination stage.  The photo above shows the dandelion plant just as it got its leaves and roots and is entering the flowering stage.  The plant looks like just leaves, but if you look in the middle, you can see the flower beginning to emerge. It is entering the next stage:  the flowering stage.  We learned that the stem will grow from 6 to 24 inches in this stage.  It has to grow before the flower emerges.  You can see below some dandelions in this stage. A bee is really enjoying the pollen!  It let all three of us take close up photos and didn't let that bother him from enjoying his meal. 


The last stage is the reproductive stage.  The flower changes into tons of little seeds.  The seeds are attached to floating structures, called pappusas, which can help carry them miles away.  This is one of the kids favorite stages!   The dandelion is asexual and doesn't need other pollen to reproduce. 


Capturing some photos of the reproductive stage.


 Next, it was time to do some journaling about all we learned.


Y'all, this is something that adults can do as well and get quite about out of it.  I really enjoy nature journaling alongside the kids, and I learn something new every time.  Even if we are not doing a "nature study", it is still really relaxing to be out in nature, and write down or draw what I observe, feel and hear.   It is a wonderful stress reliever.


Luke is at a great age for nature journaling. 
Now, it's time for us to prepare and enjoy some dandelion tea and dandelion fritters! 

My Most Favorite Dessert in All the World!


On our first Valentine's Day together, Drew and I visited a restaurant in Austin that is known for its desserts.  It was there that we shared the most amazing dessert we had ever had!  It was a flourless chocolate torte, with a raspberry sauce drizzled on top of the torte (and in a fancy manner on the plate), along with sliced strawberries, which were delicately placed.  It was at that moment that both me and Drew realized we had found our most favorite dessert in all the world!   When we honeymooned in Switzerland, we found that there were some pretty amazing flourless chocolate tortes there as well!

Me, in Switzerland, devouring my favorite dessert!
One of my favorite things to do is figure out how to make my favorite restaurant dishes at home.  By doing this, we can enjoy our favorite dishes as much as we want, for a fraction of the cost of enjoying it at a restaurant.  And considering one slice of our favorite dessert is $8 at our local Austin restaurant, I can make it for a steal!  And that is what I did upon returning home from our honeymoon.  I tried several recipes before finding "the one."  And, lucky for you, I am sharing it below.  It tastes exactly like our favorite at the restaurant (that is famous for their desserts)!  This recipe is extremely rich, and is pretty big, so it is best for sharing.  I only make this once a year:  either on Valentine's or on Drew's birthday (because it is his favorite).  I think making it only once per year makes it even more special.   If you love chocolate, you will LOVE this dessert.  If you don't love chocolate--don't bother!  And want to know another plus?  It has absolutely no flour and is completely gluten free--so if that is a concern, you can check that off the list.  Enjoy!

The recipe is found here: 
http://www.epicurious.com/recipes/food/views/La-Bete-Noire-235831

La Bete Noire

Yield:  Makes 16 servings  (although you could probably get more servings than that out of this.  It is pretty rich!)

Ingredients 

Cake:

    • 1 cup water
    • 3/4 cup sugar (I use coconut palm sugar)
    • 9 tablespoons (1 stick plus 1 tablespoon) unsalted organic butter, diced
    • 18 ounces bittersweet (not unsweetened) or semisweet chocolate, chopped  (I use 18 ounces of these chocolate chips: Guittard (brand) extra dark chocolate baking chips, as the ingredients are pretty clean)
    • 6 large eggs

Ganache:

    • 1 cup heavy whipping cream (I recommend organic)
    • 8 ounces bittersweet (not unsweetened) or semisweet chocolate, chopped (I use 8 ounces of these chocolate chips: Guittard (brand) extra dark chocolate baking chips)
    • Lightly sweetened whipped cream (we don't even use this--instead, we serve with fruit like raspberries or strawberries)

Preparation

  1. For cake:
    1. Preheat oven to 350°F. Butter 10-inch-diameter springform pan. Line bottom of pan with parchment round; butter parchment. Wrap 3 layers of heavy-duty foil around outside of pan, bringing foil to top of rim. Combine 1 cup water and sugar in small saucepan. Bring to boil over medium heat, stirring until sugar dissolves. Simmer 5 minutes. Remove from heat.
    2. Melt butter in large saucepan over low heat. Add chocolate and whisk until smooth. Whisk sugar syrup into chocolate; cool slightly. Add eggs to chocolate mixture and whisk until well blended. Pour batter into prepared pan. Place cake pan in large roasting pan. Add enough hot water to roasting pan to come halfway up sides of cake pan.
    3. Bake cake until center no longer moves when pan is gently shaken, about 50 minutes. Remove from water bath; transfer to rack. Cool completely in pan.
  2. For ganache:
    1. Bring whipping cream to simmer in small saucepan over medium heat. Remove from heat. Add chocolate and whisk until smooth. Pour over top of cake still in pan. Gently shake pan to distribute ganache evenly over top of cake. Refrigerate cake in pan until ganache is set, about 2 hours. DO AHEAD: Can be made 2 days ahead. Cover and keep refrigerated.
    2. Run knife around pan sides to loosen cake; release sides. Cut cake into wedges and serve with whipped cream

Tuesday, February 7, 2017

Exploring We Will Go

Foreseeing that today was going to be a gorgeous day, a couple of days ago we decided that we would go explore one of our favorite places in Austin--Mayfield Park and Preserve and Laguna Gloria-- today.  Well, actually that is two places, but they are right next door to each other.  We typically visit Mayfield Park and Laguna Gloria about 4-5 times per year, but we actually haven't been there in more than 6 months, so it felt like a whole new experience once again.

Mayfield Park and Preserve is a gorgeous park, that is home to beautiful, lush landscaping, ponds and peacocks.  It is especially fun to visit during peacock mating season!  So, we always start our trip there and explore a bit.  Then, we hop on the hiking trail and explore!   We met friends there, which always makes the experience more fun.


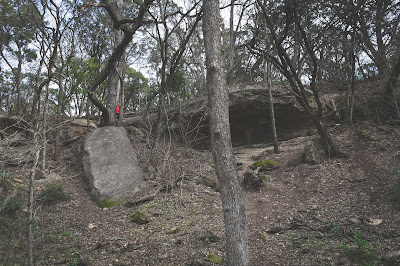
There is so much there to explore and climb.    The rocks are huge and they make an excellent "playscape" for the kiddos (and adults who love to climb). 

Do you spy Luke?
 It is difficult to tell in this photo below, but the kids had just climbed up a ton of rocks and were standing on a little rock cliff.  Even the littlest legs climbed up that thing!  I am not sure what the boys are doing in this photo, and I am not sure Abbey knows either.  But, I love it.


We have frequented these trails, so this climbing was very familiar to us.  That is, until the next part of our hike.  Luke took off running and found something that he thought was a trail.  It definitely did not look like a familiar trail to me.  In fact, it looked more like the bed of a stream that had dried out.  It was strange though because I don't recall being able to climb up it in the past.  I think it has always been full of water when we have visited.  Luke was certain it led somewhere cool though, so we all followed him.  These are kids who love to explore, so we let them.  It was kind of cool to explore unchartered territory.  We were being trailblazers!


We all climbed to the top only to realize that it was a road and a bridge.  And most definitely not a shortcut.  According to Google maps, we would have been walking for a very long time had we taken that road back to our vehicles.  So, we turned back around and climbed down from the very steep, but gorgeous, moss-filled stream area.  And, Luke was not allowed to lead the way anymore.  Ha!

As usual, the boys found their way into the water and began building a tower out of rocks. 
After hanging out near the water for a while, we headed over to Laguna Gloria.  We love exploring the grounds of this outdoor art museum.  Abbey loves the crying bunny fountain.  I have several photos of her in front of this statue from the past couple of years. 

Abbey and her friend, Matthew
After exploring the park for a bit, we soon realized that the lake level had been lowered 10 feet or so.   I guess they do this annually to tidy up the lake, by removing duckweed and other nuisance plants.   It's also a great time to do dock repairs.  Someone told me that they do this only every 6 years or so, so we visited at just the right time.  With this lowered lake level, it made for an awesome day for more exploring new territory.   None of us had explored the bottom of a lake before.  This was awesome!

Matthew and Abbey loved the feeling of the soft sand that remained after the water was lowered.  They pretended they were at a beach and made some sand castles.

There were shells EVERYWHERE!

It truly was an awesome experience. 

There was so much to see and explore.  We spent a ton of time exploring the lake bed. 
We collected whole clam shells. 

I even came away with a really unique piece of driftwood that I plan on using as decoration on Luke's room.

Then we decided it was time to explore the rest of the park.

This was a fun exhibit.  From the Laguna Gloria website: "Road Angel, 2016, a bronze cast of a 1953 Chevrolet coupe, embodies a range of emotional and nostalgic associations with the American automobile. The artist has placed this three-wheeled car far from any road, resting haphazardly amid the trees, as if the vehicle has careened off its path or the stage were set for a lovers’ tryst."  The exhibit had lights and audio. 
It wasn't long though before we found ourselves back on the bottom of the lake.  :-)  It was just so cool and we couldn't get enough of it. 


There were so many shells to choose from!


We could have stayed there all night.  But, since it was 4:15pm, we thought it may be wise to head home, otherwise we could be caught in the Austin traffic for a while.  But, before we left, we went inside the gorgeous home on the property for a trip to the restroom and some cold water.  It was over 80 degrees today and we did a lot of exploring.   So, we drank all of the water we brought!


I love this room in the home.   It is so dreamy!  Here, Abbey was taking a little rest, while waiting on Luke, before we headed home. 

I read an article today from U.S. News and World Report that Austin was named the #1 place to live in the U.S.  I totally get why.  It is amazing!   We get to be outside year-round here.  Not only that, but there are so many beautiful places to explore.  Often when we go hiking within our city, we totally feel like we are in a far-away land.  I am so thankful that God planted me here back in 2005.  I have lived here for almost 12 years and I still find so many new places to explore.   In fact, while the kids were at their one day homeschool enrichment academy yesterday, I explored another gorgeous place:  Riverplace.  I last went there when I first moved here, so it was like a completely new place for me.  I can't wait to visit again with Drew and the kids.   Exploring we will go!  Always!


Sunday, February 5, 2017

What We're Eating This Week

I am going to keep on posting these because I have heard some have gotten some use out of these.  I think meal planning is a chore for all of us!  So, if I am already doing the work, I may as well share.  Use some or all of the recipes, it's up to you!  But, the recipes I have posted thus far (and will be posting all this month) are tried and true recipes at our house.  These are regular hits.  The kids love them and they are all vegetable-centric.

I am also going to include some of our favorite snack recipes that are regulars for our home.  Our primary snacks throughout the day are fruits, but I also make a special snack either once a week or every other week.   A snack I am featuring this week are our favorite granola bars.  These last no time at our house.  They have a lot of protein though, and are excellent to bring with us on hikes.   They are ridiculously delicious!  So, we double this recipe or they would only last a day or so at our house!


from the Detoxinista blog:

Ingredients
  • 2 cups gluten-free rolled oats
  • ½ cup creamy natural peanut butter (unsalted) (make sure the only ingredient in your peanut butter is peanuts)
  • ½ cup honey
  • ½ teaspoon sea salt

Instructions
  1. Line a standard loaf pan with parchment paper and set aside.
  2. In a small saucepan over medium-high heat, bring the honey to a boil. Set a timer, and allow the honey to continue boiling for 1 minute. In the meantime, place the oats in a large bowl and set aside. Remove from the pan of honey from the heat and stir in the peanut butter and salt.
  3. Immediately pour the warm mixture over the oats, and use a spatula to stir well, coating the oats evenly. As the mixture cools, it will become sticky and difficult to mix, so be sure to move quickly!
  4. Transfer the mixture to the lined loaf pan, and press HARD to pack it into the pan. Pressing firmly will ensure that the bars stick together well later. Place the pan in the fridge or freezer to cool, then use a large knife to cut the bars.

Notes: We store these in the fridge, and they are gone within a few days.  Also, we usually switch out some of the oats with cashews or sunflower seeds or both.  This adds even more protein.  We typically use 1/2 to 1 cup of cashews and then use oats for the remaining of the 2 cups.  You can sub sunflower butter if you have a peanut allergy.  These are completely gluten free, quick and easy to make and delicious!!!!

Here is this week's dinner meal plan:

I made the chicken enchiladas from last week's post this weekend.  We have the 2nd casserole dish of enchiladas left so we will start our week off with those leftovers.

Monday:  Chicken Enchiladas and Mango Salsa Leftovers

I love how colorful this meal is.  And it is equally as delicious!

Tuesday:  Baked Southwestern Eggrolls: This recipe is an excellent way to get your non-veggie lovers to eat and love veggies.    You can either use store-bought egg roll wrappers (you can find some that are pretty clean--especially if you go to an Asian market.)  But Whole foods and HEB (and even target and walmart) carry them.   You may need to ask an employee at the super market where to find them, because every store puts them in a different place.  The ingredients aren't in line with the "rules" we follow, but every now and then it's ok to break the rules, right?  We aren't perfect.  You can also make egg roll wrappers very easily: http://allrecipes.com/recipe/22532/egg-roll-wrappers. Making them is a way we get away with following all of our real food rules.  It just depends on how much time you want the meal to take.

Baked Southwestern Eggrolls Recipe:

INGREDIENTS

 2 cups frozen organic corn, thawed
1 can (15 ounces) black beans, rinsed and drained
1 package (10 ounces) frozen chopped organic spinach, thawed and squeezed dried
1 1/2 cups of monterey jack cheese, shredded
1 can (4 ounces) chopped green chilies, drained
4 green onions, chopped
1/4 cup chopped cilantro
1 teaspoon ground cumin
1/2 teaspoon chili powder
1 teaspoon salt
1/2 teaspoon pepper
1/4 teaspoon cayenne red pepper
1 package (21) egg roll wrappers
 **1 egg beaten for sealing egg roll (or you can use water--that's what I usually do)

DIRECTIONS:
    In a large bowl, combine everything but the egg roll wrappers. Place ~1/4 cup mixture in the center of one egg roll wrapper. Fold bottom corner over filling. Fold sides toward center over filling and continue to roll tightly to seal (see directions on egg roll wrapper). Using your finger, moisten remaining corner with egg. Repeat. Place seam-side down on a baking sheet coated with parchment paper. Brush tops of egg rolls lightly with olive oil. Bake at 425 degrees F for 10-15 minutes until lightly brown. Turn them halfway through baking.
Serve warm with salsa, guacamole and/or sour cream.
We will eat these with chips and salsa, and maybe also add another vegetable (roasted) or a side salad. 

Wednesday:  Chipotle Chicken Sweet Potato Skins   You are going to LOVE this meal. 

Healthy Chipotle Chicken Sweet Potato Skins Recipe:

Ingredients
  • 3 medium sweet potatoes
  • 3/4 pound (about 2 small) boneless skinless chicken breast
  • 1/4 cups olive oil
  • 2 tablespoon fresh lime juice
  • 2 cloves garlic, minced or grated
  • 3 whole chipotle pepper, minced
  • 1 teaspoon dried oregano
  • 1 teaspoon cumin
  • 2 teaspoons chili powder
  • salt and pepper
  • 2 (half a 10oz bag) cups spinach
  • 5 ounces sharp white cheddar cheese, grated
  • chopped cilantro, for garnish

Instructions
  1. Preheat your oven to 350 degrees. Wash your sweet potatoes and prick all over with a fork. Place in the oven and bake for 50-60 minutes or until fork tender. Place your chicken in a baking dish and rub with a tablespoon of olive oil, salt and pepper. Place in the oven with the potatoes and bake for 25 minutes. Allow to cool and shred the chicken with a fork or your hands. When the sweet potatoes are done cut in half and allow to cool for 5-10 minutes.
  2. In a medium size bowl combine the olive oil, lime juice, garlic, chipotle peppers, oregano, cumin, chili powder, salt and pepper. Set aside.
  3. Heat a small skillet over medium heat and wilt the spinach (this can also be done in the microwave). Toss the spinach and shredded chicken together, set aside and keep warm.
  4. Turn the oven up to 400 degrees. Scrape the sweet potato out of the peel, leaving a medium size layer of flesh inside with the peel so that it can stand up on its own (I reserved the remaining flesh, for another use) and place in a baking dish. Brush the skins with with a little of the chipotle sauce and bake for 5-10 minutes until nice and crisp. While the skins bake mix the spinach, chicken and chipotle sauce together. Remove skins from the oven and stuff with the chicken mixture, top with shredded cheese and bake for 10 minutes or until the cheese has melted and the skins are hot and crisp. Serve with fresh chopped cilantro (and greek yogurt) if desired.
Notes:  I put all the sweet potatoes that I remove from the skin in a big bowl and mash them with some honey and cinnamon.  They are delicious!   If you want to make them creamy, you can add some butter as well and blend them until fluffy with a hand blender.  I often add a couple more potatoes to this recipe and adjust the quantities of the remaining ingredients so that we can have leftovers the next day.  These taste even better the next day!!

Thursday:  Leftovers

Friday:  Chopped Salad, with quinoa, apples and sweet potatoes:  This is my favorite salad. My family knows it well because I always make it a big family gatherings---on July 4th or even Thanksgiving.  It is always a hit.  I pair it with my homemade maple balsamic dressing.  With the apples and sweet potatoes and then the sweet dressing, even the kids devour this meal.

Chopped Quinoa Salad with Apples and Sweet Potatoes Recipe:
Servings: 8-10
Ingredients
  • 2/3 of a cup of organic quinoa
  • 2 large sweet potatoes cut into small cubes
  • 1 tablespoon of extra virgin olive oil
  • salt/pepper
  • 2 large apples
  • 7-8 cups of packed veggies – split between kale, romaine, spring greens and spinach or whatever you want (I like to chop these up)
  • 1/4 cup of parsley
  • 1/4 cup of red onion sliced or diced
Instructions
1. Set your oven to 400 and let it preheat
2. Put a dab of olive oil in your pot and add the quinoa to let it cook for 1-2 minutes.
3. Add 1 and 1/2 cups of water to the quinoa and let it boil
4. Tun it to a simmer and let it cook for 14-17 minutes. Stir the quinoa halfway through. Keep the pot covered
5. Grab a rimmed baking sheet and place your potatoes on it. Drizzle the olive oil over top and sea salt as required.
6. Bake in one of the top racks of the oven for 22-23 minutes until crispy
7. Mix the quinoa, potatoes, apples, greens, onion and your favorite dressing (mine is the homemade maple balsamic mentioned above) in a large mixing bowl.
8. Serve fresh or pack in your salad container for a quick lunch tomorrow!
Each serving has 7.3 grams of protein.

My maple balsamic dressing: I really don't have exact amounts.  I do it to taste by simply mixing a good quality olive oil, with some balsamic vinegar and then add pure maple syrup to taste.  I would say the portions are close to a ratio of 4 times balsamic vinegar to 1.5 olive oil to 1 maple syrup.  You can also sprinkle in some sea salt or even add a teaspoon or tablespoon of dijon mustard.  You will have a lot left over of this going into the weekend!